Please check local/state laws or municipal code in your area related to proper use and installation of this product.
The first time you use an electronic device it can be a little confusing. So, if you have any problems getting your Pilot Dash Camera up and running, please call us to help you troubleshoot whatever issue you’re having.
At Pilot, your satisfaction is why we’re in business. If for any reason your experience with our product was anything less than satisfactory, please reach out to us. We’d love to have the opportunity to provide the product experience and service you deserve.
Customer support line available from 7:30AM – 5:30PM PST:
800. 237. 7560
Email: [email protected]
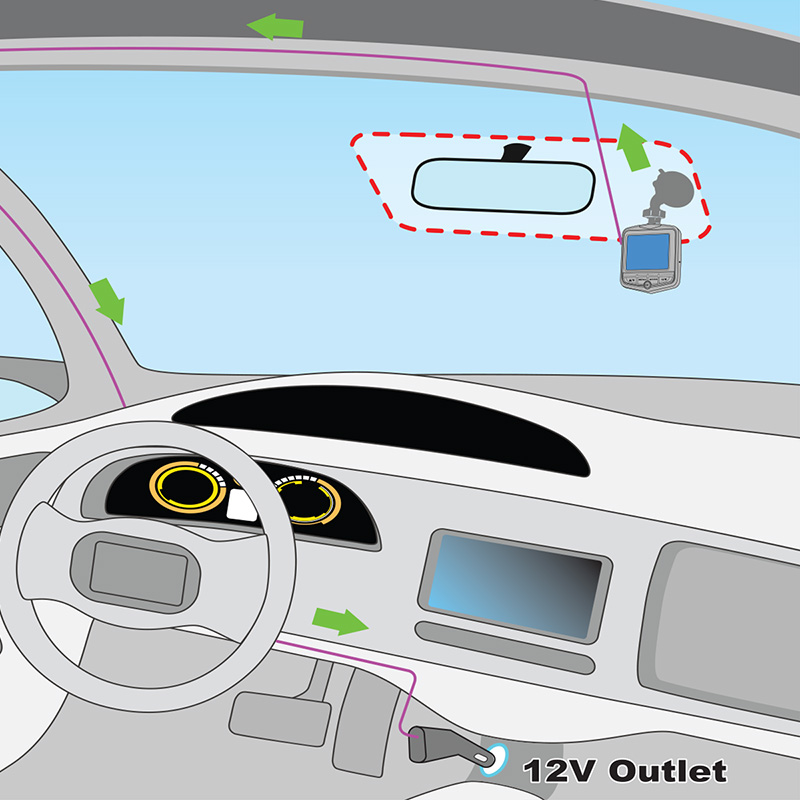
The AUTO ON/OFF feature allows the camera to turn OFF and ON if connected to your vehicle’s 12V port.
NOTE: Some vehicle’s 12V ports provide power even after vehicle’s ignition is turned OFF. In this case you will have to manually turn the camera OFF by pressing the POWER button.
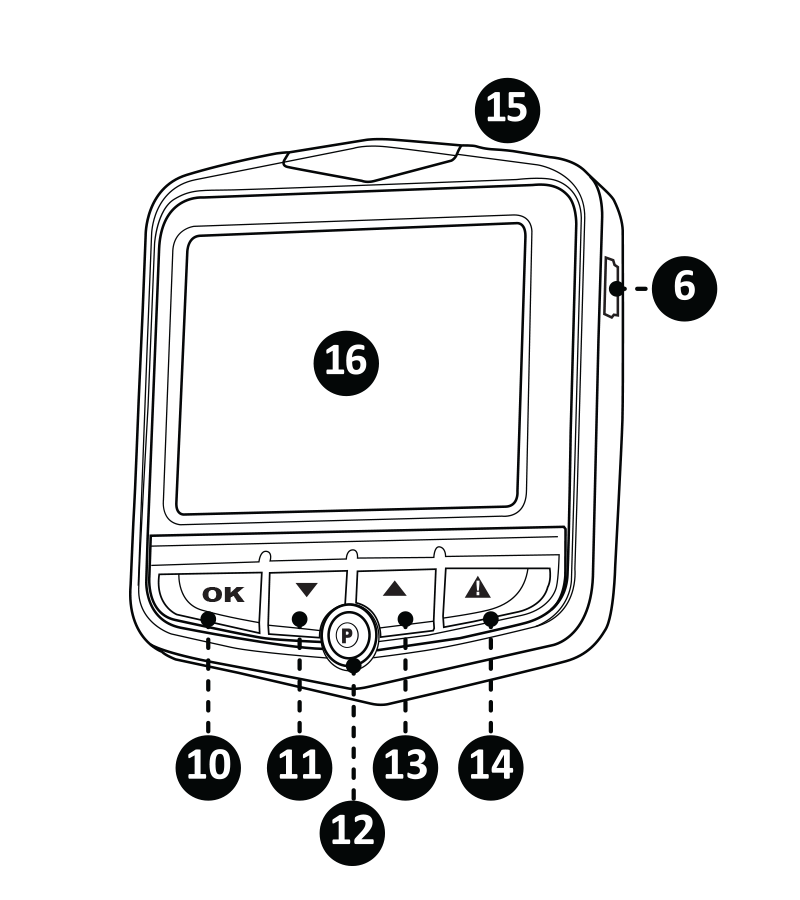
Select desired mode by pressing MODE button:
VIDEO MODE Allows you to record video.
PHOTO MODE Allows you to capture images.
PLAYBACK Allows you to playback video files you have recorded with camera.
MENU SCREEN While in CAMERA MODE, PHOTO MODE, or PLAYBACK MODE, pressing the menu button will allow you to enter the settings of that mode. This will allow you to make custom changes to that mode.
RESOLUTION Change resolution of the camera.
IMAGE QUALITYChange resolution of photos.
LOOP RECORDING The camera will take short video increments (1,2, or 3 minutes) and when storage is full, it will delete the oldest recorded file to make room for a new one. You can also disable this feature.
MOTION DETECTION The dashcam will sense motion and automatically begin recording when powered ON. Toggle ON/OFF for this feature.
WHITE BALANCE Change between SUNLIGHT, CLOUDY, TUNGSTEN, FLUORESCENT, or AUTO white balance.
SHARPNESS Set sharpness settings (0 -5).
EV (EXPOSURE VALUE) Set the exposure value (-2, -1, 0, 1, or 2).
AUTO RECORD The dashcam will automatically start recording (when a memory card is installed) when powered ON. Toggle ON/OFF for this feature.
SCREEN SAVER Set the time it takes for screen saver to be activated (3, 5, or 10 minutes). It can also be turned off.
AUDIO RECORDING Toggle ON/OFF for audio recording.
PARKING MODE While powered ON, the camera will sense motion and automatically begin recording. You can disable this feature or change the sensitivity of the motion sensor.
G-SENSOR While in loop recording, this feature will lock a video file and protect it from being deleted when the camera is jarred or senses a sudden shock. This camera has 3 sensitivity settings: low, mid, and high.
AUTO POWER OFF Set the time it takes for camera to automatically power off after a period of inactivity (3 or 5 minutes). It can also be turned off.
TIME SETTING Set the date and time for the dashcam.
LANGUAGE Set the language for the dashcam.
DATE TAG Toggle ON/OFF time stamp.
FORMAT Completely delete all files in the storage card.
RESET SYSTEM Reset all settings of the dashcam
DELETE / DELETE ALL Delete current file / delete all files
LOCK THIS / LOCK ALL Lock current file / lock all files When a file is locked, the loop recording feature will not delete it while recording. A locked file must be manually unlocked before it will be deleted automatically once storage is full.
UNLOCK THIS / UNLOCK ALL Unlock current file / unlock all files When a file is not locked, the loop recording feature will delete the oldest files automatically once storage is full.